Should You Add Organic Cleaning Services To Your Carpet Flooring Cleaning Business

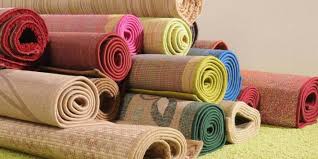
How Often Should You Deep Clean Carpet And Area Rugs?

It’s a new year, and if you’re anything like us, you’re planning out projects that you want to get done in 2020. One annual home project that should be on everyone’s list is deep cleaning carpet and area rugs throughout the home. Rug Doctor experts recommend deep cleaning your carpet at least once every 12 months. But did you know in some situations, you should be deep cleaning your carpet on a more regular basis? If you’re wondering how often you should deep clean your carpet or area rugs, read on for our expert recommendations.

Have Cigarette Smokers in Your Home?

If you have tobacco smokers at home who smoke indoors, it’s important to deep clean your carpet every three months in homes with heavy smokers and at least every six months in homes with moderate to light smokers. Tobacco smoke contains numerous types of gasses and particulate matter, including some that have been known to cause cancer. These harmful gasses can be absorbed into dust in a room, ending up in your carpet, area rugs, upholstery and other soft surfaces. According to this 2002 study, these toxins can then re-emit back into the air and recombine to form harmful compounds. This becomes dangerous for even the non-smokers in the household. Deep cleaning your carpet with a Rug Doctor removes these toxins and helps prevent them from re-entering the air in your home.

What to Do if You Have Children at Home?

If you have small children in your home, we recommend deep cleaning your carpet at least every six months. But not for the reason you may think. Yes, children cause more spills and accidents, but we have spot cleaning products and machines to help you deal with those daily messes. Our main concern is the exposure your kids may have to the bad things hiding in your carpet. Carpet is soft and warm and a great place for the little ones to play, or nap, or picnic, or build forts. The list goes on and on! Unfortunately, according to the American Lung Association, children are more likely to be exposed to pollution in carpet, both because they spend so much time playing on it and because they’re likely to place their hands in their mouths. We recommend deep cleaning more often to remove these containments and to reduce the chance of exposure. The best way to do this is to deep clean your carpet with a professional-grade machine, like the Rug Doctor Pro Deep Cleaner.

What About Pets at Home?

If you have furry family members living indoors, we recommend deep cleaning your carpet at least every six months. Carpet and area rugs do a fantastic job of trapping pet dander deep within the fibers. While this is great for air quality initially, simply walking on or even vacuuming can make it airborne again. Pet dander is tiny flecks of skin shed by animal with fur or feathers. (Yep, your birds have dander, too!) Because of their microscopic size, it’s easy for pet dander particles to settle deep within your carpet. Yuck! Want to hear something even yuckier? Dried saliva, urine or dust from dried feces can also flake off your pet in a similar manner and become trapped deep within the fibers. While regular vacuuming can help, it’s not enough on its own, because it doesn’t remove all the tiny particles hiding deep beneath the surface. Deep cleaning is the only way to truly and thoroughly wash your carpet and area rugs. Yes, deep cleaning is important from a cleanliness perspective, but it’s doubly important for those with pet allergies. Even if you aren’t allergic to pet dander, there’s good a chance that many of your guests may have a pet allergy. According to the Asthma and Allergy Foundation of America, 3 in 10 people in the US with allergies have allergic reactions to cats and dogs. And cat allergies are about twice as common as dog allergies. A buildup of pet allergens can make respiratory symptoms worse and decrease lung function in people with even the slightest allergic reaction to pets. The absolute best way to remove pet allergens from your carpet is to deep clean your home on a semi-annual basis.

When A Family Member Has An Allergy

Not sure how often to clean your carpet?

It depends on whether someone in your household has allergies. Carpet fibers work as a filter, collecting dust and allergens floating around the room.

Eventually, they will build up and become airborne once someone walks across the room. You must give your carpet a thorough clean to remove allergens and clear the air. Aim to vacuum once a week and hire a professional carpet cleaner every two months.

Cleaning Light-Colored Carpets

Light-colored carpets brighten up a room but they also highlight any dirt and stains. This means they’ll need more frequent professional cleaning compared to darker carpets.

Vacuum once a week, clean spills immediately and treat carpet stains when they arise. And, to ensure your light-colored carpet looks its best, get a professional clean every six to 12 months.

How Often Should Carpets be Cleaned Professionally?

Carpet manufacturers vary on their recommendations as to how often carpets should be professionally cleaned but most say that carpets should be cleaned every 12 to 24 months but there is more to this which you should know about as their recommendations seem to be based on appearance only.

There have been a number of studies which have shown that bio-contaminants like mould is very effectively handled with hot water extraction cleaning (steam cleaning) and the clean carpet does not support regrowth even for prolonged periods of elevated humidity and temperature even though we don’t normally have high humidity levels in Melbourne.

Generally speaking, there are real benefits in having clean carpets. Leaving it too long between having your carpets cleaned can be unhealthy.

So, with these factors in mind, how often should carpets really be cleaned?

There are a number of factors other than time that should be taken into consideration as to determine how often your carpets should be cleaned.

For example, if you have young kids and there is a lot of use and the occasional spillage, it may be worth cleaning the carpet more often than every twelve months. If in addition to these factors, you also have pets and there was a smoker in the house, more frequent cleaning may be needed.

For family residences, carpets should be cleaned every 6 to 12 months but if you have children or pets, having the carpets cleaned every 3 to 6 months would be more appropriate.

Additional Tips

In additional to regular vacuuming and professional cleaning there are some things you can do to keep your carpets in a better condition for longer. These include:

  • Use mats at the entrances to the building to help catch particles being walked in.
  • Use a vacuum cleaner that has a rotating brush which lifts more particles.
  • When spillages occur, immediately spot clean with a mild detergent. There seems to be a general misconception that when a spillage occurs it should not really be touched. This is incorrect. Clean the spot by dabbing, not rubbing using a detergent that is very mind because detergents which are too harsh can damage the carpet fibres. Watch out for carpet spot cleaning products sold at supermarkets as they can damage your carpet. I would personally never use them. More information on what not to use for spot cleaning can be found here.

Mistakes To Avoid

You’ve realized it’s time to clean your carpet. But before you dive in, consider these common mistakes:

Over-Wetting Or Over-Shampooing

This happens when too much water soaks into the bottom of the carpet. As a result, the carpet will discolor when it’s too wet and even shrink, tearing itself up from the floor.

When your carpet is soaked, it’s difficult to dry out, therefore increasing the risk of mold and mildew.

Another problem is over-shampooing the carpet. If this is the case, there will be a build-up of soapy residue that is impossible to clean, leaving your carpet susceptible to attracting more dirt.

Furniture On Wet Carpeting

If you set your furniture on wet carpeting, there is a major risk of staining if they are in contact for too long. Or, as many tables have partially metal feet, there’s a risk of leaving rust stains on the carpet.

The Pros And Cons Of Hardwood Flooring For Your Home

Preparing for Hardwood Floor Installation

First order of business was to remove all of the furniture, and then cut the carpet into four sections of 36-in. strips. This made it easy to roll the carpet into manageable strips and carry to the trash bin.

Once the carpet was removed we removed all of the carpet tack strips, swept the floor thoroughly and then installed 2-in. deck screws into the subfloor and floor joists approximately every 24 in. to help eliminate to possibility of flooring squeaks.

Flooring Moisture Content

Hardwood flooring needs to acclimate in the rooms where it is going to be installed for several days to allow it to adjust to temperature and humidity. Otherwise, if installed without acclimating, gaps and/or buckling may occur. Many contractors suggest leaving the wood on the jobsite for two weeks to acclimate well in hopes of preventing any issues.

The truth is that some wood flooring may already be at the proper moisture content when delivered. Allowing it to sit in extremely heavy humidity will only cause the wood planks to absorb unwanted moisture.

It’s best to know what the moisture content of your wood planks are at the time of delivery and what the expected moisture content will be in the room when it will be installed. I always ask the manufacturer what the flooring moisture content is and then double check with my moisture meter.

Lay Out the Room

Hardwood flooring should be installed on a solid, structurally sound subfloor. Whenever possible, determine the direction of your floor joists and plan on installing your plank flooring perpendicular to the joists.

Install 15-lb. Kraft paper underlayment on the entire floor, overlapping the roll edges by 3 inches. The Kraft paper acts as a vapor barrier. A utility knife is used to cut around objects like door jambs, radiators or other permanent objects. A few well placed staples hold the Kraft paper in place.

On this installation we were installing the hardwood flooring against the existing room trim so no shoe molding was to be used.

Select a few straight, long boards to start the first row. Using a table saw, rip the grooves off at a 15-degree angle to get the first starter row of planks to fit tight to the wall’s baseboard trim.

Tool setup is Critical

A proper tool setup is critical for installation. Locate your compressor and saw stand in a place where you can conveniently access the tools as well as the work you’re performing.

We took the time to measure from the opposite wall to determine if the room was square. You guessed it—it wasn’t.

Using a tape measure and snapping a layout chalk line a few feet out from the wall we were able to determine if the room was square or not. This is important information when determining how to rip the starter courses.

Your layout chalk line should be exactly parallel to the wall so you can make sure your floor boards are in alignment as you work your way across the floor installing them. From this mark, measure to the opposite wall to check for equal distance at both ends. If it isn’t parallel, the flooring won’t be either, so it may be necessary to slightly adjust your guideline.

It turned out that the starter course needed to be ripped a total of 1/2-in. over the course of 12 feet. Doing this step at the beginning of installation saved us time and aggravation later at the opposite wall, trying to get the last board to fit. We continually check our progress as we cross the room.

All about Nailing or Stapling your flooring down

If your installing 3/4″ thick solid wood flooring you will need to either rent or purchase a larger flooring nailer that is either a manual nailer that you swing and strike the top of the gun with a steel mallet several times to drive the cleat nail.

Or, you can rent or purchase a air assisted pneumatic nail gun and compressor where you strike the top of the nailing gun with a rubber mallet once which activates the air which drives the cleat or staple into the wood. The pneumatic nailer either the cleat nail style or staple style makes the job of nailing the flooring down easier.

Both types of nailers have a guide along the bottom front edge of the gun that keeps it aligned so that they will drive the nail or staple in the proper position along the inside top of the tongue of the boards. Both types of nailers can have an interchangeable base plate for thinner flooring.

When using 1/2″ or thinner solid wood flooring or thinner engineered flooring you will need to rent or purchase an easy pull trigger stapler that is also run by a small compressor to drive staples into the top inside edge of the tongue of the flooring. These type of nailing guns have an adjustable base plate to accommodate different board thicknesses. (Naturally click lock or direct down installations are not nailed.)

When starting the installation the first 2-4 rows of flooring you will not be able to fit in and use either of the nailers noted above. You will have to either pre-drill the boards and hand nail or you can use an air assisted finish nailer that uses a small compressor to drive nails either down through the top of the boards and/or if held at the proper angle blind nail on the inside edge of the tongues of the floor boards this is also true when installing your last rows of flooring against the finishing walls. The installation goes a lot faster using an air assisted finish nailer which uses the same small compressor as the above flooring nailers.

Proper nailing is essential to avoid any problems later. We suggest face nailing every 8 inches along the back side of the starting row and then blind nail every 6-8 inches along the tongue of every board thereafter staying 4 inches in from each end of the board to prevent the splitting of the wood boards.

Tips to Avoid the Pitfalls

Examine your subfloor

If your subfloor is in poor condition, putting down hardwoods won’t help. You need to have a relatively level subfloor, and any changes in height should be less than 3/16″ over a 6′ span. There are a couple different ways to level out a subfloor.

Acclimate the wood

Increased moisture causes wood to expand while less moisture causes wood to contract. This is called wood movement. It’s important for hardwoods to acclimate in the space where they will be installed. Wood that is not fully acclimated will result in gaps during the winter and possibly cupping during the summer. To avoid this, open and spread out the boxes for about a week, and be sure to run the A/C or heat at normal levels. Never store the hardwoods in a moisture rich environment like an unfinished basement.

First Row Must be Straight

It’s very important for the first row of hardwoods to be installed straight as every row after will be laid relative to it. A crooked first row will result in large curves as you progress through the space. Exterior walls are often not square so consider marking a line parallel to an inside wall, opposite of your starting position. Mark the locations of your joists and install the hardwoods perpendicular. Make sure you drive a fastener into a joist at each opportunity. Consider what obstacles, like a fireplace hearth, are present how different starting points will make the job easier.

Top nail and glue the boards

You’ll encounter scenarios where the flooring nailer will not fit, like when laying the last board. Invariably, you’ll need to top nail or face nail these boards. Grab your wood glue and add a bead to the groove of the previous board. Use scrap wood and a pry bar to securely wedge these boards in place. Be sure to hold the finish nailer with adequate force to prevent it from jumping around and marring the surface of the board.

Maintenance Instructions & Helpful Tips

  • Vacuum your floor every week. Fine grit and dust is just like sandpaper and will slowly wear through your wood floor’s finish. So a good vacuuming protects the finish as well as keeps up its appearance.
  • Wipe up spills immediately. Make sure you wipe up spills immediately with a slightly dampened towel.
  • Watch the hairspray and the furniture polish. Both of them can cloud your floor’s finish. Wipe them up immediately with a damp cloth. For a more thorough cleanup, you can spray the area with non-ammonia window cleaner and immediately wipe it up.
  • Keep out the rain. Water can not only ruin the finish on a hardwood floor but can penetrate deep into the wood and stain it. Immediately wipe up any water spill on your hardwood floor.
  • Remove residue with no-wax wood floor cleaner. Wipe up spills and dirt immediately; then use the cleaner to remove the residue. Dirt can damage the finish or get ground in. Liquids can damage the finish or stain the floor.

Down the Road:

Routine maintenance is key to preserving wood floors, so put these three tasks on your to-do list in the future:

Get your floors deep cleaned and add a fresh coat of finish every three to five years. Make sure you know what type of finish your floors already have (oil, wax, urethane) because you’ll need to reapply that same kind.

Whatever you do, resist sliding furniture. Enlist a friend and pick things up to move them.

Every few decades, sand and refinish wood floors to make them look new again. Typically, solid, wood floors can be re-sanded five to ten times during the expected lifespan. The beauty of wood flooring is its ability to become like new with a fresh finishing coat and a deep cleaning. If you’re not sure if it’s time for a fresh finish, check with an expert first.

Laminate Flooring History And Timeline

Laminate Floor Buying Guide

What Is Laminate Flooring?

Laminate flooring is a synthetic product made of several layers that are sealed together in the lamination process. Designed to be affordable and durable, laminate flooring consists of four distinct components:

Wear Layer

The wear layer helps resist scratches from daily wear, creates an easy-to-clean surface and maintains a fade- and stain-resistant appearance.

Décor Layer

The décor layer is a printed image that recreates the natural look of wood, tile or stone.

Core Layer

The core layer gives laminate its structure and dent-resistant properties. Laminate flooring is much more resistant to dents than real hardwood flooring.

Backer Layer

The final backer layer provides additional support and stability.

How to Choose the Best Laminate Floor

How is laminate flooring constructed?

Each layer in the laminate flooring structure serves a distinct purpose, but they all work together to make it reliably durable. What the layers are called and the exact specifications for each layer may differ depending on the manufacturer and the product, but here’s what you’ll find in Armstrong Flooring’s laminate flooring products:

– Wear Layer – VisionGuard® is a clear, hardened melamine layer that protects the floor from spills, stains and fading and resists scuffs and scratches. Many of our high-quality laminate flooring products actually have Commercial VisionGuard®, which has a higher abrasion test rating and provides ultimate protection.

– Design Layer – A photographic image displays highly realistic visuals of hardwood or natural stone.

– Inner Core – HydraCore™ is our moisture-resistant HDF (high density fiberboard) that provides the flooring with stability, durability and moisture resistance. Our highest quality laminate flooring products feature HydraCore™ Plus, which further adds a more substantial feel and optimum sound absorption.

– Backing – This balancing layer reduces warping.

Laminate Flooring Buying Guide

How Laminate is Made?

There are two types of laminates . One, known as DPL, or Direct Pressure Laminate, the other known as HPL, or High Pressure Laminate. With the HPL process, the backing and top wear layers are treated separately and then fused directly onto the core, creating a very strong floor suitable for very heavy traffic.

HPL laminates consist of the same four layers as in Direct Pressure Laminate, with the fifth layer being a special high-strength paper. HPL flooring is generally more expensive than DPL flooring but many residential applications won’t require this type of floor. To better understand which laminate is right for you, learn more about how laminates are made here.

The Accessories You’ll Need

You’ll need more than just the planks of laminate to complete your floor. Underlayment, moldings, transition pieces, trim, even adhesives will need to be part of your installation. Make sure your vendor has all these pieces ready for your job.

Underlayment

Underlayment is a thin foam padding that absorbs sound as well as some of the very minor imperfections in the sub-floor. You will also need either a separate moisture barrier or an underlayment with a moisture barrier if your floor will be on or below grade or in an area subject to moisture. You can purchase underlayment by the roll and lay it down before you install your laminate or you can buy a laminate with a pre-attached underlay, making installation even quicker and easier.

Ultimate Guide to Laminate Flooring

Laminate flooring was developed in Sweden in the 1980s, and it­’s come a long way since then. High-end laminates offer a textured appearance, so the finish looks realistic from up close as well as from afar. Original laminates don’t have these finishes and tend to look more realistic from a distance. Laminate floors can replicate many types of wood, including all colors of oak, Brazilian cherry, mahogany, walnut, chestnut, hickory, maple, ash and pine, just to name a few. For people who want the look of more than one surface in their home, laminates can also mimic stone.

All of these traits make laminate flooring an attractive choice for people who want exotic and authentic looks in their homes. In this article, we’ll explore what goes into making laminate floors and why their designs are so realistic. We’ll also give you some tips for cleaning and maintaining laminates.

Buying a Laminate Floor

Installation

With laminate flooring, the installation is usually pretty simple. Most products will have “click together” designs that will simply lock into place like a child’s toy. Others may require a small amount of adhesive to be used in order to secure them in place. This affects the price because it gives you the option to do the work yourself, effectively eliminating the added expense of having to hire professionals.

Life Cycle

With any floor, you can’t just think about the cost at the time of installation. You also need to factor in how long the material will last, and how well it will hold up in a particular environment. With laminate floors you are buying a relatively temporary product, that will wear down over time and have to be replaced. That means that it may not be as cost-effective as other more premium options.

Maintenance

Laminate floors do not exist in a vacuum, although a vacuum can be a great way to clean a floor. The main thing to remember is that the material you choose will have to be cared for overtime. Some of the cleaning procedures for different products can be involved, rigorous, and require the purchase of a number of specialty items. Luckily laminate has a protective-wear layer which actually keeps most of the dirt and debris off of its surface, making it easy to sanitize whenever you think it is proper.